如何升级pip版本
作者:yasden
头图是AI画出来的,头图不是真人,是AI画的!本文提供AI绘图软件Stable Diffusion的安装教程。本教程是将软件安装到电脑上的本地版,无需上网就可以开始AI画图。本教程是我根据网上无数大佬的经验,再结合我自己的经验,亲自探索出来的(全网应该没有我这么全面细致的安装过程),我已经把坑都踩过了,按照本文教程肯定可以成功安装,欢迎收藏备用。本文是用Linux系统(Ubuntu发行版)进行安装的,其他包括windows和Mac系统的安装过程与此类似,不再赘述,因为windows安装过程遇到的问题,linux照样会遇到,所以这篇文章可以给需要在win或者mac安装的朋友提供不少借鉴作用。欢迎收藏备用。
划重点:python3 launch.py 回车之后遇到的卡顿、安装无法进行下去的问题,绝大部分是由于网络原因造成的,将网络问题解决了,就能安装成功。遇到找不到软件的情况,换一个pip镜像即可解决。
AI画图有多强大?下图是用AI画的,我不说的话,大家以为是修图软件修出来的真人吧?

下图也是AI画出来的:
本安装教程正式开始:
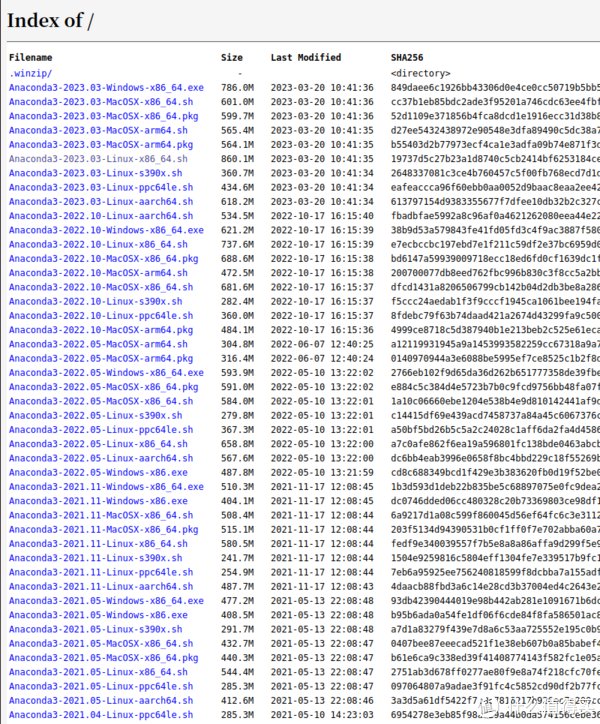
第1步、去清华镜像站下载Anaconda3-2023.03-Linux-x86_64.sh到电脑上
点击Anaconda3-2023.03-Linux-x86_64.sh文件下载到电脑上。
第2步、打开终端,CD到Anaconda3-2023.03-Linux-x86_64.sh所在的文件夹下面,然后用下面的命令安装anaconda3:
bash Anaconda3-2023.03-Linux-x86_64.sh
安装开始后,出现下面的界面:
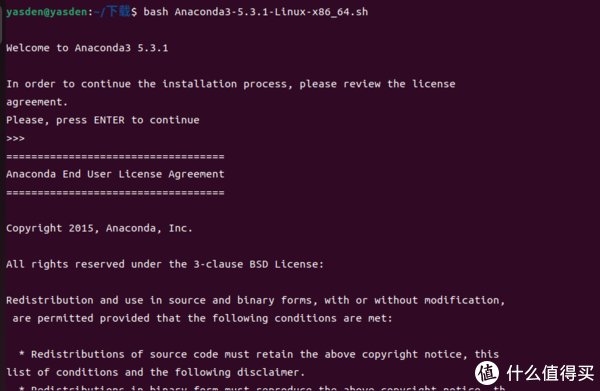
第3步、按照提示安装anaconda3,出现Thank you for installing Anaconda3!这句话,代表anaconda3安装成功了。
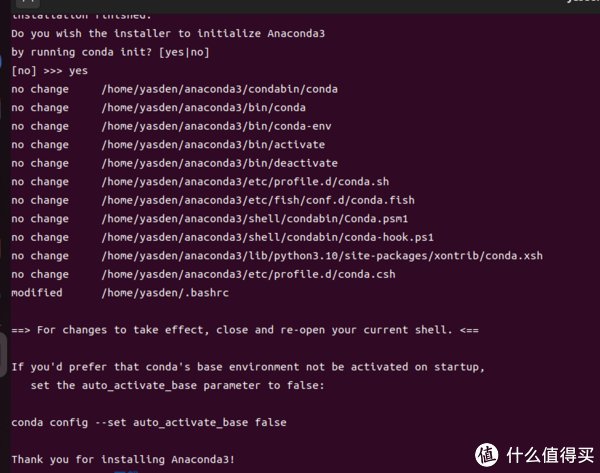
安装anaconda成功后,conda回车显示“找不到命令”怎么办?
安装成功后,我敲了conda或者anaconda3回车,都没有任何反应,见下图:

这是没有设置造成的。
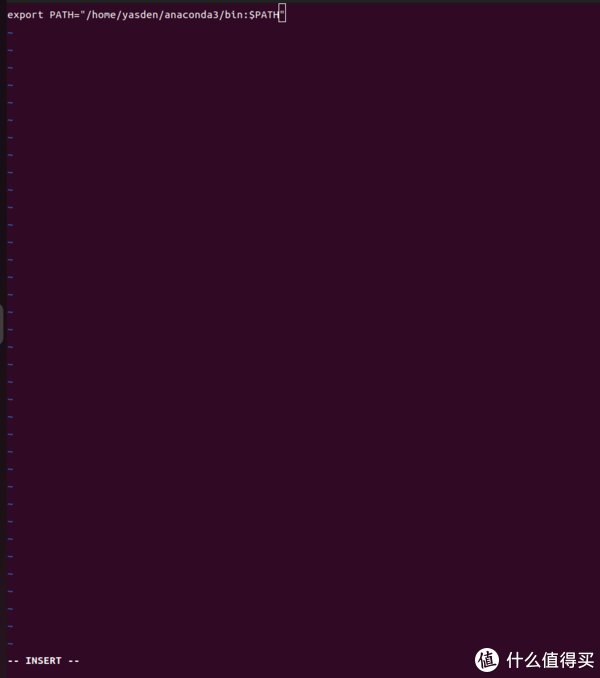
第4步、修改bashrc文件
用下面的命令修改bashrc文件:
sudo vi ~/bashrc
输入密码后进入修改界面,先是点击ESC按键,然后点击“ i ”字母,这时候会在左下角出现--INSERT--的图标,输入下面的语句:
export PATH="/home/yasden/anaconda3/bin:$PATH"
之后点击ESC键,然后输入:wq!回车即可保存修改并退出。
注意:export PATH="/home/yasden/anaconda3/bin:$PATH"这条语句,yasden是我的电脑的名字,你的电脑的名字一定不是yasden,注意替换掉这个名字即可。保存退出的时候,:wq!一共是4个键,冒号加wq字母加感叹号。
第5步、source /.bashrc
source /.bashrc回车之后,会在命令行前面出现(base)的标签(见下图):
conda --version测试一下是否可以正常运行。
显示conda 23.1.0之类的提示,代表conda安装成功。
第6步、conda create -n sok1 python==3.10.6搭载python虚拟环境(我后来发现这个步骤可以省略,第6步跳过即可)
注意:
conda create -n sok1 python==3.10.6
这条命令的python==3.10.6是我的机器上的python版本,你的版本不一定是这个。sok1是虚拟环境的名称,你可以随意设置成不同的名称。
第7步、激活虚拟环境sok1,sok1这个名字你可以随意取,例如取s1之类的,或者取abc也行。(第7步可以跳过,不做这一步也可以)
用下面的命令激活sok1这个虚拟环境:
conda activate sok1
这时候,你的命令行前面出现(sok1)的图标(见上图)。
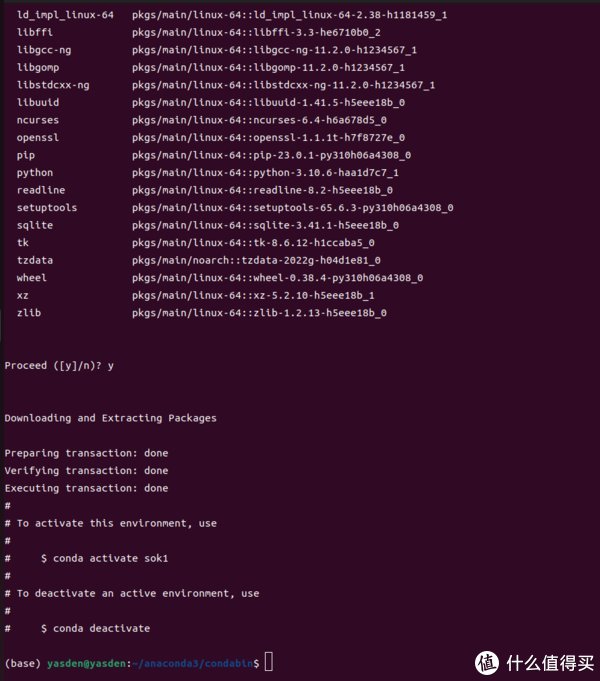
第8步、升级pip,然后更改默认下载地址为清华的镜像地址
python -m pip install --upgrade pip
pip config set global.index-url https://pypi.tuna.tsinghua.edu.cn/simple
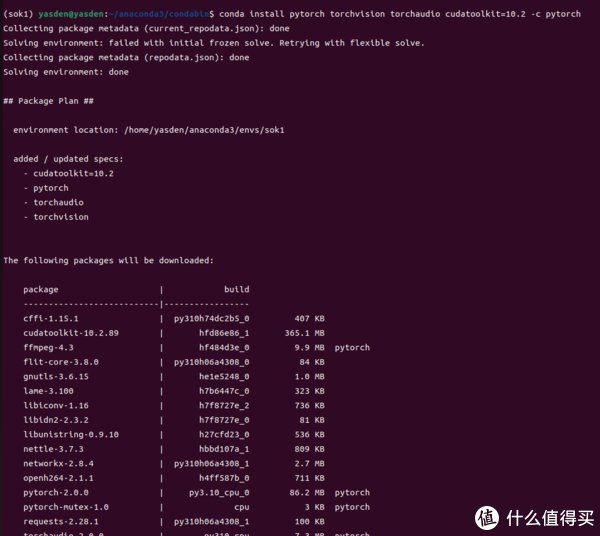
第9步、安装pytorch
conda install pytorch torchvision torchaudio cudatoolkit=10.2 -c pytorch
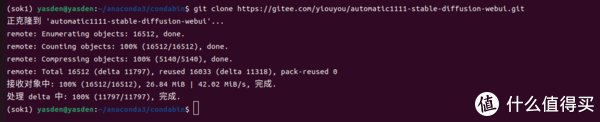
第10步、安装stable-diffusion-webui
git clone https://gitee.com/yiouyou/automatic1111-stable-diffusion-webui.git
上面的命令执行后,会将一个下面名字的文件夹(包括文件)下载到电脑上:
automatic1111-stable-diffusion-webui
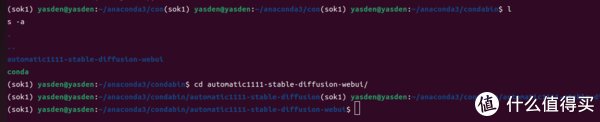
第11步、CD到automatic1111-stable-diffusion-webui目录下
automatic1111-stable-diffusion-webui这个目录是刚刚你git clone的那个目录,这个目录怎么找呢?用ls命令或者用其他的命令来找,然后cd到这个目录下。一般来说,你刚刚运行git clone的时候,所在的目录就是那个automatic1111-stable-diffusion-webui的所在目录。
第12步、安装依赖包
pip install -r requirements_versions.txt
pip install -r requirements.txt
上面两条命令分别回车执行。
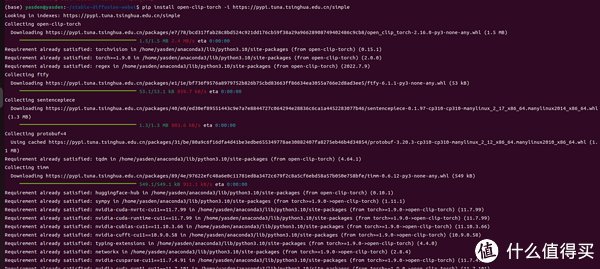
第13步、继续安装包
pip config set global.index-url https://pypi.tuna.tsinghua.edu.cn/simple
pip install torch
pip install torchvision
pip install gfpgan
pip install clip
pip install opencv-python-headless
上面6条命令分别回车执行。
第14步、运行python3 launch.py
我将automatic1111-stable-diffusion-webui这个目录改名为stable-diffusion-webui了,cd到stable-diffusion-webui目录下,然后:
python3 launch.py
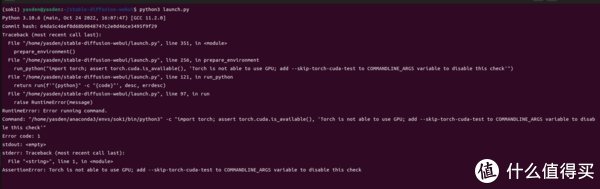
第15步、解决报错问题
发现出现下面的错误:
AssertionError: Torch is not able to use GPU; add --skip-torch-cuda-test to COMMANDLINE_ARGS variable to disable this check
第16步、查看报错原因
torch.cuda.device_count() 回车后,显示0
torch.cuda.is_available() 回车后,显示False,代表没有可用GPU
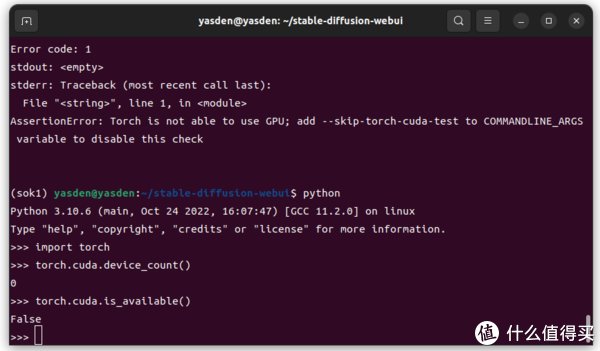
AssertionError: Torch is not able to use GPU; add --skip-torch-cuda-test to COMMANDLINE_ARGS variable to disable this check 出现这个错误的原因是由于驱动程序的版本,和其他软件的版本不一致造成的。
第17步、删除nvidia驱动

sudo apt-get --purge remove nvidia-*
sudo apt-get purge nvidia*
sudo apt-get purge libnvidia*
用上面的三个命令,分别回车,将nvidia驱动软件删除掉。
第18步、安装nvidia-driver-515
打开“软件和更新器”,然后点击nvidia-driver-515 来安装这个版本的驱动。
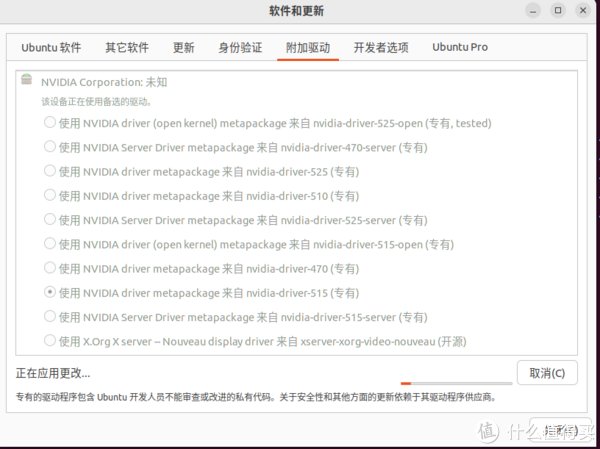
nvidia-driver-515 对应的cuda版本是11.7(见下图):
下图怎么显示出来呢?nvidia-smi回车即可。看见下图代表你的驱动安装成功了。

第19步、重启后安装pytorch
打开PyTorch官网,这个官网会自动选择你的驱动下载命令(见下图)。由于PyTorch似乎只是支持cuda11.7和cuda11.8,如果你的cuda是12.0的版本,似乎不支持,要删除12.0的驱动后,安装11.7或者11.8的对应的英伟达显卡驱动。
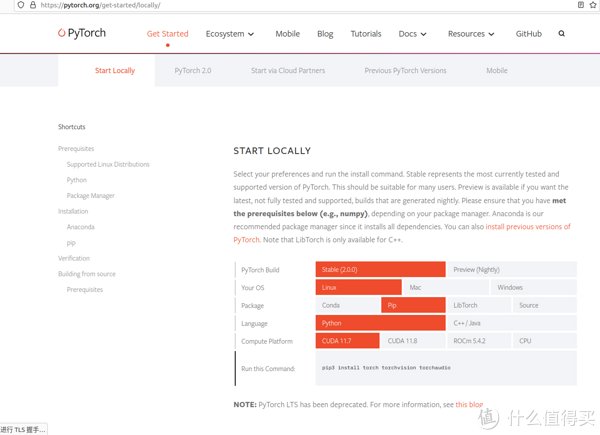
用下面的命令安装torch(这个命令是pytorch官网推荐的安装命令,见上图,网页会自动显示你系统应该使用的命令,如果你的cuda是11.8的版本,会自动推荐其他的下载安装命令)。11.7的linux系统是采用下面的命令:
pip3 install torch torchvision torchaudio
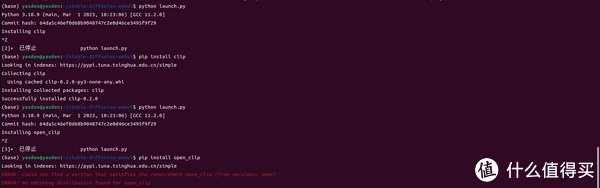
第20步、运行python launch.py
发现python launch.py之后,系统显示Installing clip之类的命令,然后就停住不动了。
control+Z停止运行python launch.py,然后用下面的命令安装clip
pip install clip
pip install open_clip报错,提示清华镜像找不到open_clip
换成阿里云的镜像试一试:
pip config set global.index-url https://mirrors.aliyun.com/pypi/simple
还是不行,然后换成下面的命令:
pip install open-clip-torch
行了
在下面这一步卡了很久不动:
Cloning Taming Transformers into /home/yasden/stable-diffusion-webui/repositories/taming-transformers...这一步卡了很久,不动,换成下面的解决方案:首先cd 到repositories文件夹,然后
git clone https://github.com/CompVis/taming-transformers.git

在下面这一步也卡了很久:
Cloning K-diffusion into /home/yasden/stable-diffusion-webui/repositories/k-diffusion

换成下面的方法试一试:
git clone https://github.com/CompVis/K-diffusion.git
如果发现在某一步卡了很久不动,先是contorl+Z停止掉程序,然后CD到stable-diffusion-webui目录下,然后重新运行下面的命令:
python3 launch.py
卡住不动代表你家网络不行了,想办法解决网络问题再来安装吧。你需要openwrt来解决网络问题。
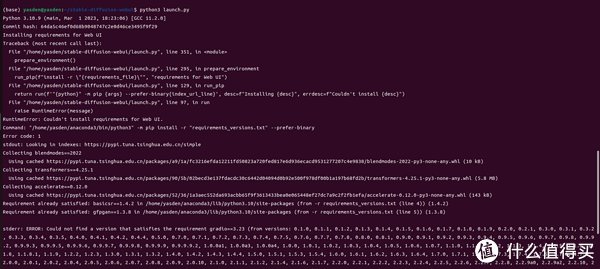
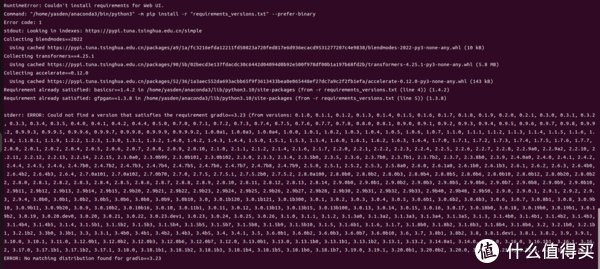
我发现出现下面这一步,卡住进行不下去了。提示:
stderr: ERROR: Could not find a version that satisfies the requirement gradio==3.23 (from versions: 0.1.0, 0.1.1, 0.1.2, 0.1.3, 0.1.4, 0.1.5, 0.1.6, 0.1.7, 0.1.8, 0.1.9, 0.2.0, 0.2.1, 0.3.0, 0.3.1, 0.3.2, 0.3.3, 0.3.4, 0.3.5, 0.4.0, 0.4.1, 0.4.2, 0.4.4, 0.5.0, 0.7.0, 0.7.1, 0.7.2, 0.7.3, 0.7.4, 0.7.5, 0.7.6,
也就是说,找不到gradio==3.23版本,无法进行下去,所以报错。
我想起来,刚才将pip的镜像设置成清华镜像,清华镜像没有gradio==3.23版本(清华更新不及时呀),无法进行下去,所以我用下面的命令,将镜像重新设置成默认的镜像:
pip config set global.index-url https://pypi.org/simple

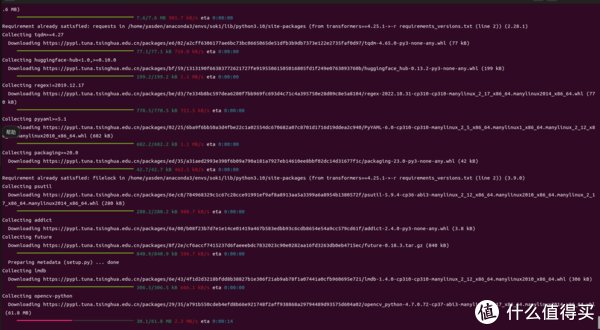
之后就可以继续了,安装过程期间,还下载了一个3GB多的安装文件,见下图。
如果你没有进行到这一步,代表你的网络不行,先解决网络问题再来吧。
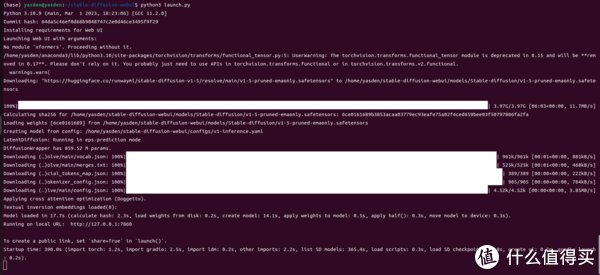
如果你看到上图的界面,代表成功了。将上图显示的127.X.X.X开头的网址复制到浏览器打开,就可以看见下图的界面:
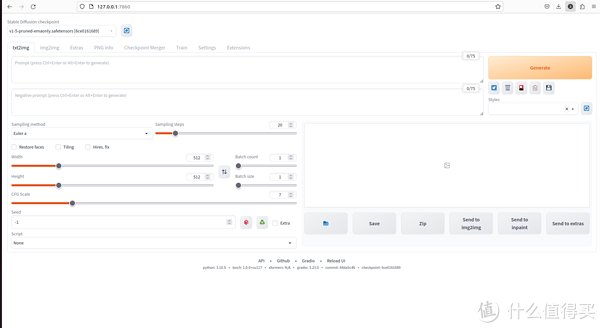
看见上图的界面,代表安装成功,你可以开始AI绘图了。
这个AI画图的速度还是很快的,我用的是3060-12GB的显卡。

好事多磨,总算可以AI画漂亮的人物卡通图了。

全文完,谢谢观看。
潘志凌3375怎么给多个python版本装pip -
尉翟些18771875839 ______ 首先当然是安装你需要的两个不同版本的python,这里我安装的是2.7和3.3的,两个版本安装顺序无所谓. 接下来就是检查环境变量,缺少的我们需要添加.先找到环境变量的位置. 在Path环境变量中检查以下4个变量(Path中的环境变量是以...
潘志凌3375在windows7中python3.4下如何升级pip? -
尉翟些18771875839 ______ 最近刚刚接触到RobotFramework,发现这个工具倒是可以满足我的要求,而且可以结合seleniumLibrary,用来做web的自动化测试相当不错.之前我也接触过selenium,不过感觉那个工具更贴近开发人员使用,有了robotFramework之后,感觉...
潘志凌3375linux下怎么安装python的运行环境 -
尉翟些18771875839 ______ 1、linux下安装python3 a、 准备编译环境(环境如果不对的话,可能遇到各种问题,比如wget无法下载https链接的文件)12 yum groupinstall 'Development Tools' yum install zlib-devel bzip2-devel openssl-devel ncurses-devel2 下载 Python3.5代码...
潘志凌3375python怎么用pip更新第三方包 -
尉翟些18771875839 ______ 方法/步骤1 在系统环境变量中指定pip.exe的路径.因为我们要用pip来安装库文件.pip.exe一般在C:\python34\Scripts路径下,所以我们修改环境变量如下:在原先的基础上加个分号" ; ",然后打入路径即可2 安装wheel 在windows cmd命令...
潘志凌3375如何用pip为Python3安装模块 -
尉翟些18771875839 ______ 一、方法1: 单文件模块 直接把文件拷贝到 $python_dir/Lib 二、方法2: 多文件模块,带setup.py 下载模块包,进行解压,进入模块文件夹,执行: python setup.py install 三、 方法3:easy_install 方式 先下载ez_setup.py,运行python ez_setup ...
潘志凌3375如何将Anaconda更新到想要的python版本 -
尉翟些18771875839 ______ 最近用Anaconda比较多,因为它里面的包很全啊.如果下个原生的python,要用的时候得自己一个个装.但是有些包又互相依赖,一个个装的时候实在很抓狂.懒人就想到了anaconda这种套装集合了.问题来了:Anaconda只能下载一个版本...
潘志凌3375python 怎么安装gnuplot模块 -
尉翟些18771875839 ______ 1、下载Python,gnuplot以及libsvm 我的电脑是64位,Win7操作系统1.1 python 2.7.6 (64位) 这里我用的Python是64位的Python2.7.6 下载地址:https://www.python.org/download/releases/2.7.61.2 gnuplot(4.6.3版本)的下载地址:http://www.gnuplot....
潘志凌3375python3.6安装scrapy时 需不需要安装visual c++ 14.0 -
尉翟些18771875839 ______ 安装python3.5,添加python和python/scripts到环境变量(里面包含 pip和easy_install 工具)命令行输入pip install scrapy 安装scrapy,如果存在哪些模块不存在的,通过pip install进行安装安装lxml时,出现"Unable to find vcvarsall.bat"错误时,...
潘志凌3375用pip安装python第三方包的时候显示错误,怎么办? -
尉翟些18771875839 ______ pip 不是在python解释器中运行.而是在windows的命令行下运行,pip在Python\Scripts目录 下,cmd,cd到该目录,然后输入pip install googlemaps . python的及其第三方库的安装,pip的使用: 1. 选择合适的版本直接点击安装,选择安装目录...
潘志凌3375python beautifulsoup怎么升级 -
尉翟些18771875839 ______ 打开cmd 输入 pip install --upgrade beautifulsoup4 进行升级