显卡代码10什么问题
作者:技术宅是我梦想
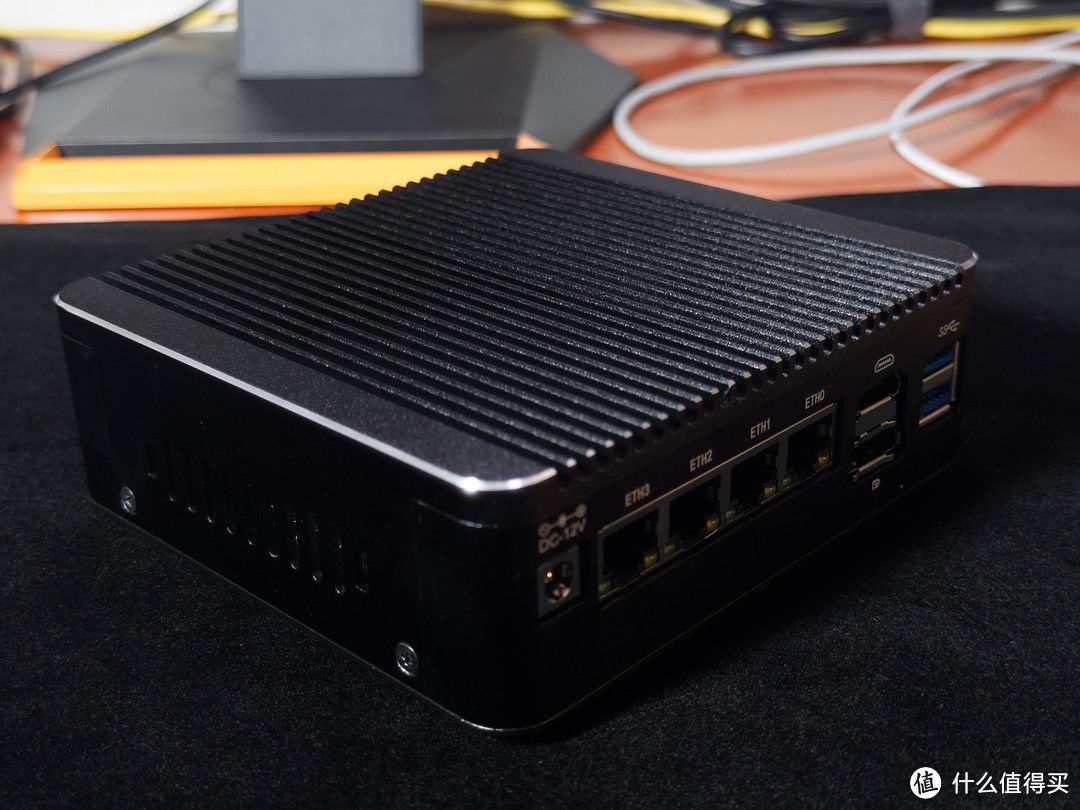
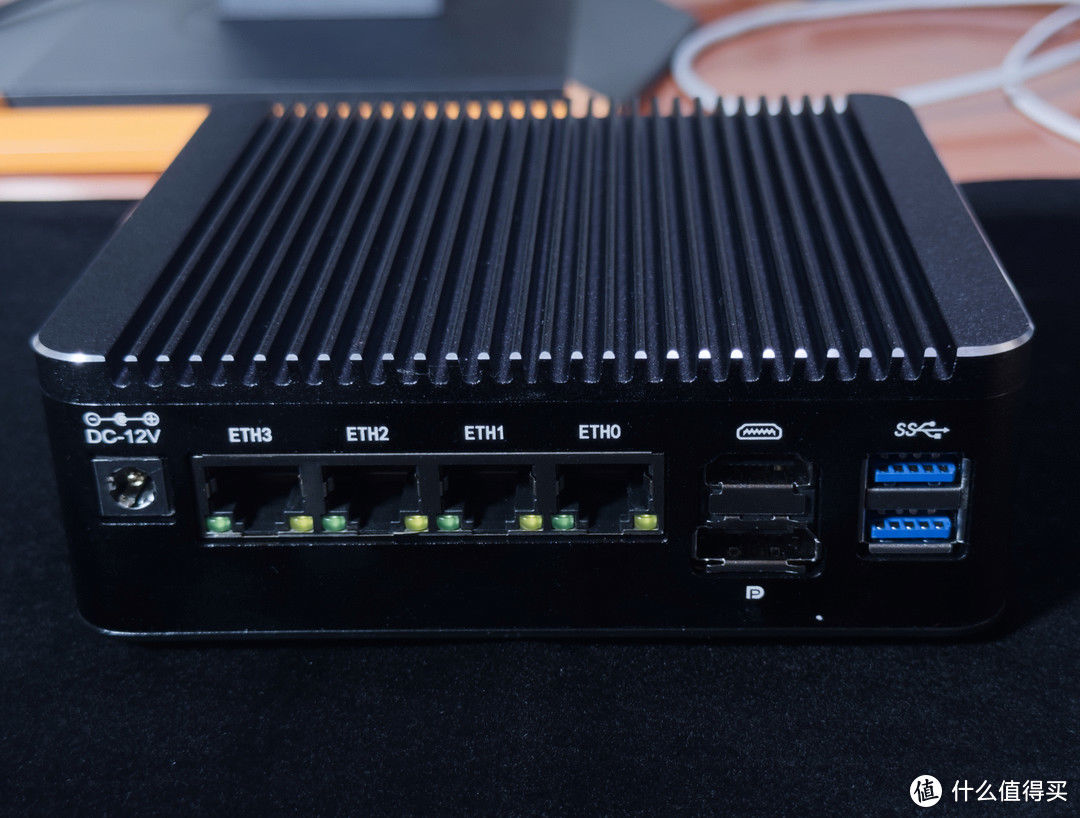
今天继续更新双十一入手N100小主机玩转指南,之所以选择N100小主机:就是冲着Intel 11 代CPU以后的显卡都是支持显卡虚拟化的,目前还在测试中,所以需要编译内核才能使用。
之前的文章已经分享过如何操作
10代级以前的CPU显卡只能用GVT技术
GPU SR-IOV guest configure(显卡虚拟化:虚拟机相关设置)
Linux Guest Configure (Linux 虚拟机设置)
sugesst your guest kernel >= 6.2 ( 建议内核版本 >= 6.2 )
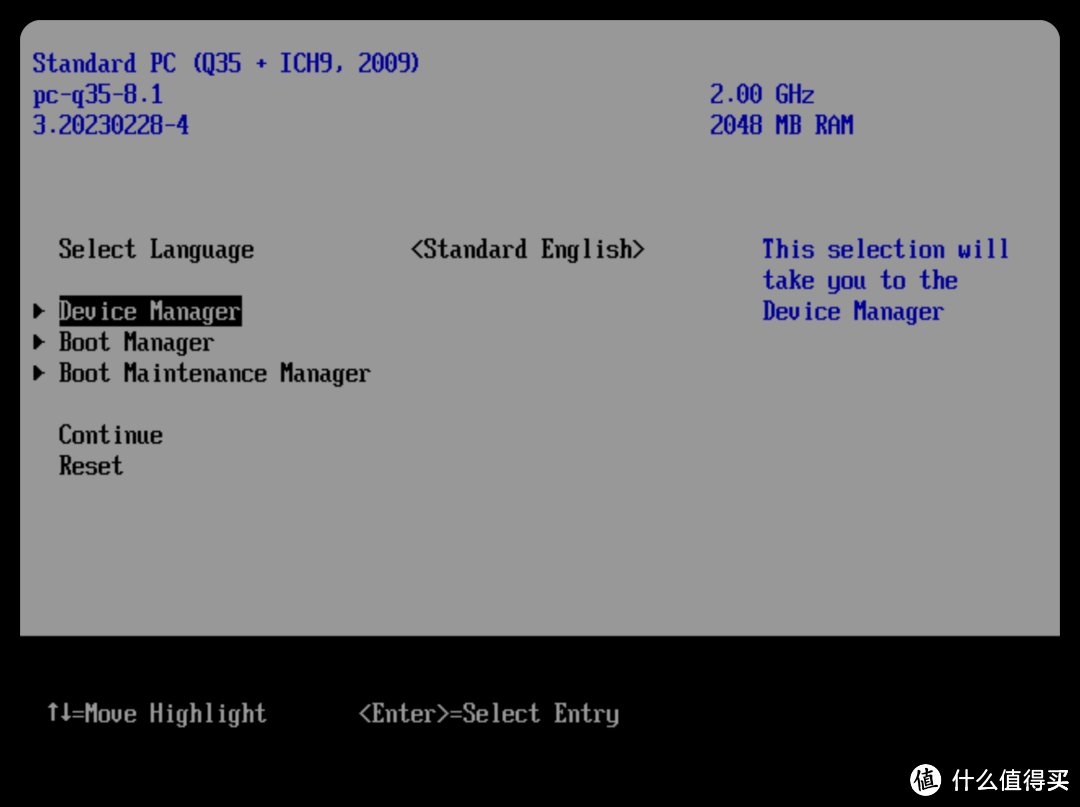
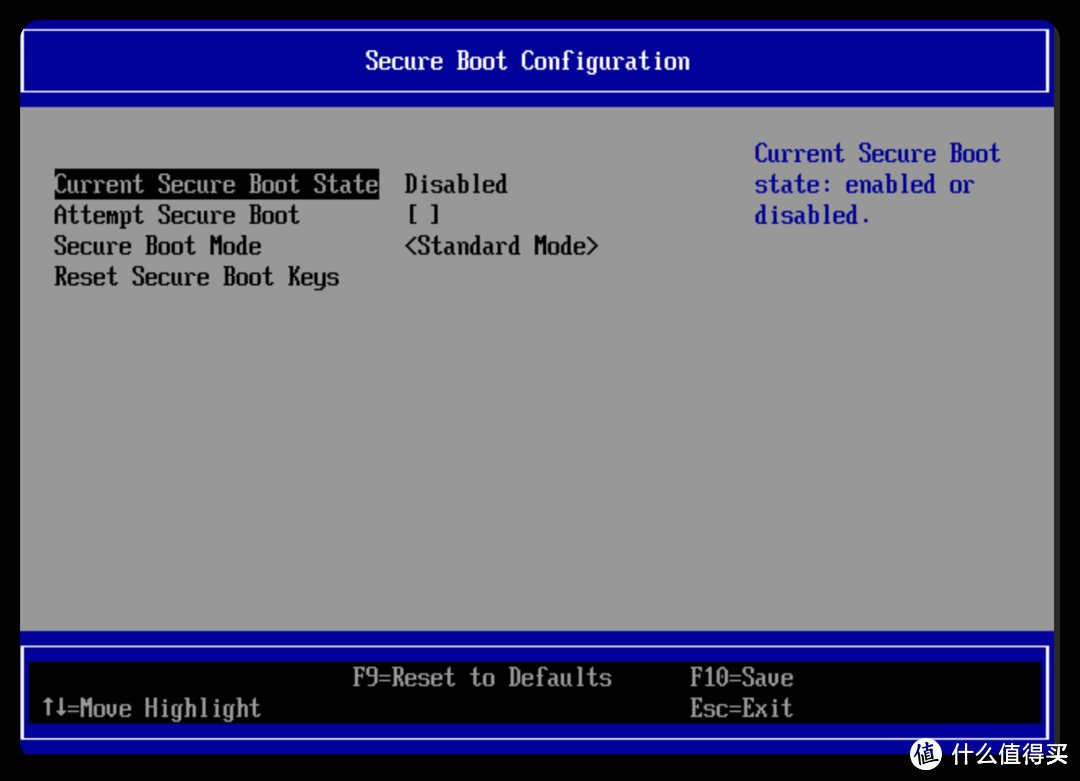
disable secure boot ( 关闭安全启动 )
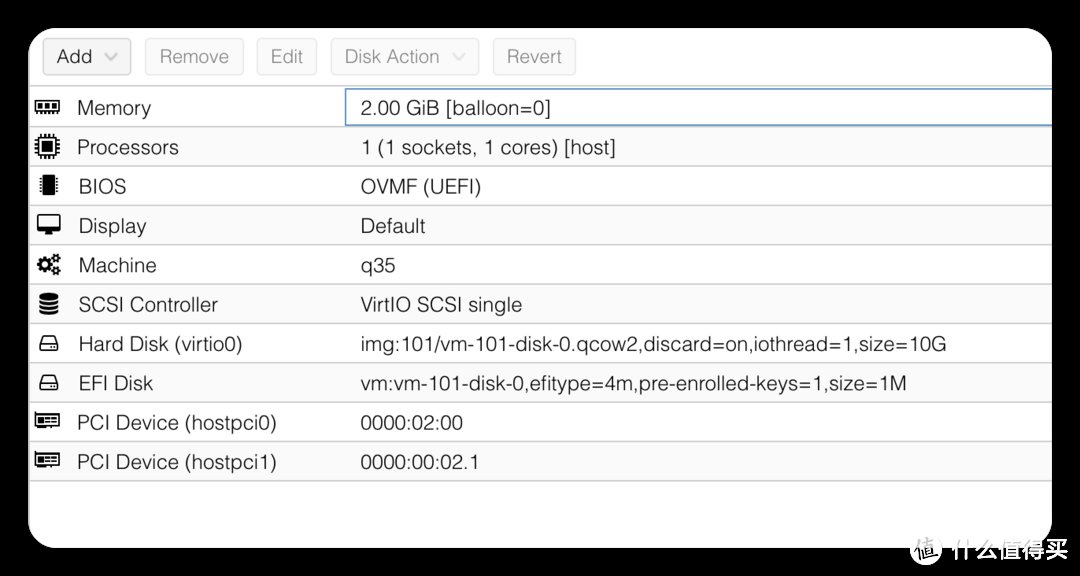
must use Q35 chip (必须使用q35芯片组)
Disable balloon (关闭内存共享)
Must use OVMF UEFI ( 必须使用UEFI启动 )
Add SR-IOV gpu after install SR-IOV i915 driver (安装驱动以后再添加虚拟显卡)
I will be use debian 12 to do this ( 接下来我用 Debian 12 代号 bookworm 来演示 )
Add backports sources (添加 backports 源)
because debian 12 default kernel 6.1,so need install new kernel (因为 debian 12 默认内核版本较低,需要添加 backports 源,安装较新的内核,我测试的版本 6.4 可用)
更改适合你网络情况的镜像, I use ustc mirrors!
echo "deb http://mirrors.ustc.edu.cn/debian bookworm-backports main non-free-firmware" >> /etc/apt/sources.list\n
Update your system 更新你的系统
# apt update\n
install new kernel 安装新内核
# apt install linux-headers-6.4.0-0.deb12.2-amd64\n
更新 initramfs
# update-initramfs -u -k all\n
重启
# reboot\n
install i915 sriov drivers 接下来打 i915 驱动打补丁
git sources 下载源码
cd /usr/src/\ngit clone https://github.com/strongtz/i915-sriov-dkms i915-sriov-dkms-6.4\n
edit file 编辑源文件
edit /usr/src/i915-sriov-dkms-6.4/dkms.conf with the following:\nPACKAGE_NAME="i915-sriov-dkms"\nPACKAGE_VERSION="6.4"\n
start dkms 开始打补丁
dkms install --force -m i915-sriov-dkms -v 6.4
edit kernel cmdline 编辑内核参数
edit /etc/default/grub with the following:\n GRUB_CMDLINE_LINUX_DEFAULT="quiet i915.enable_guc=3"\n
update initramfa 更新 initramfs
# update-grub\n# update-initramfs -u\n
poweroff 关机
# poweroff\n
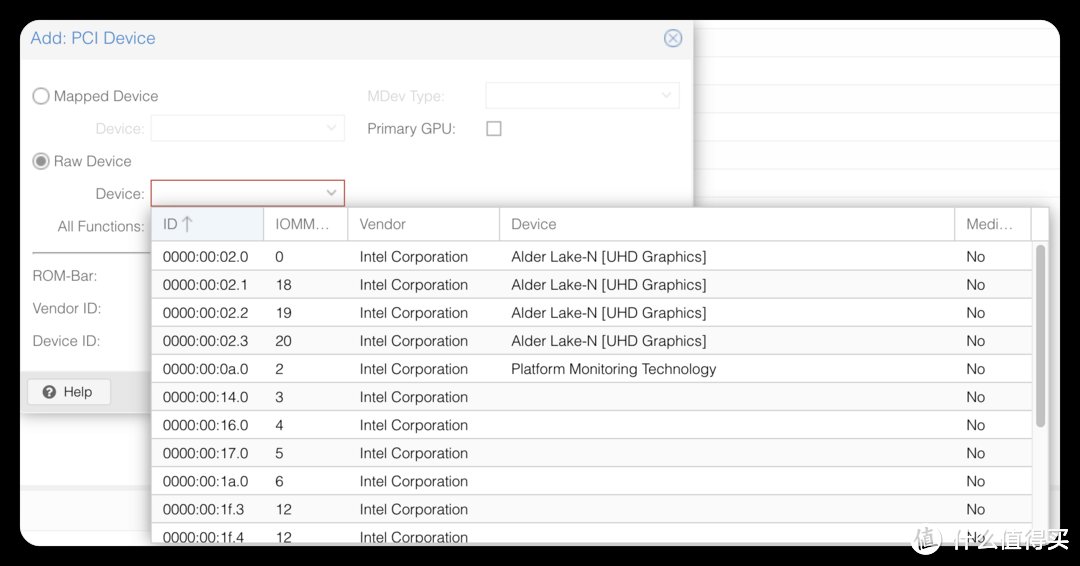
Guest add SR-IOV iGpu 虚拟机添加虚拟显卡
boot your guest 启动虚拟机
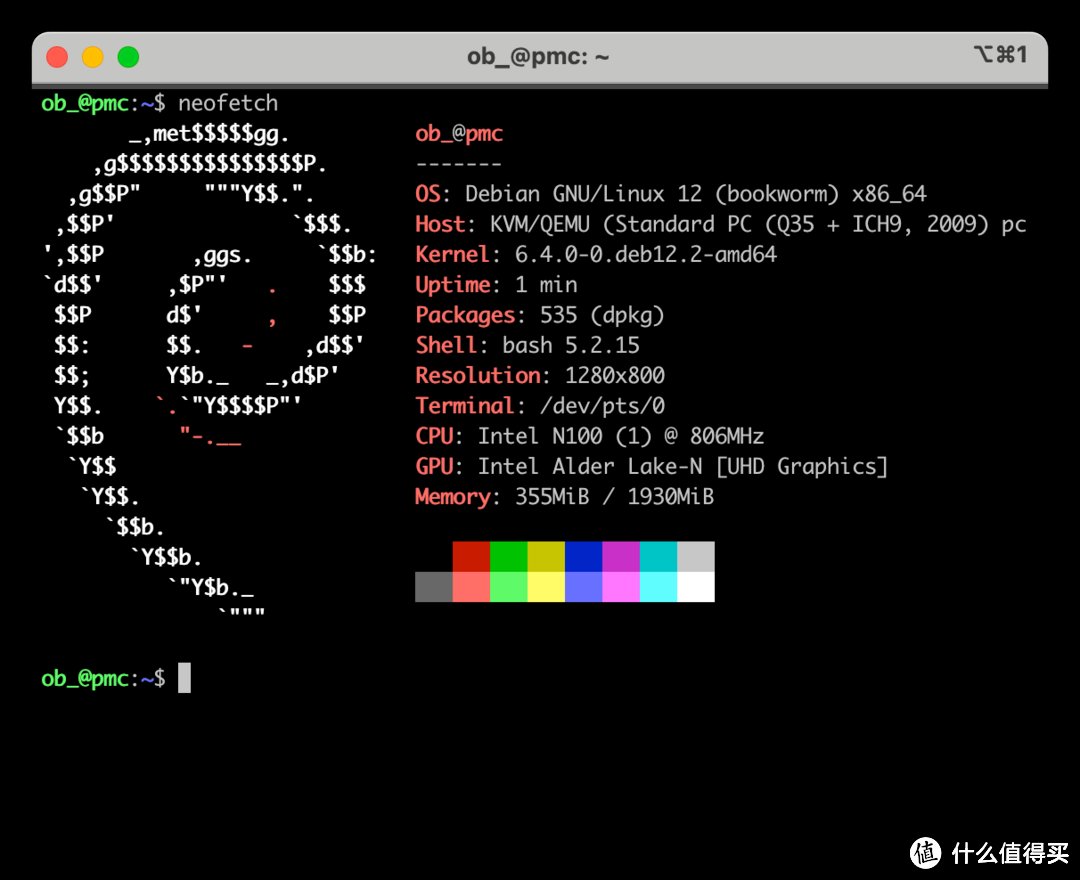
check 检查是否工作

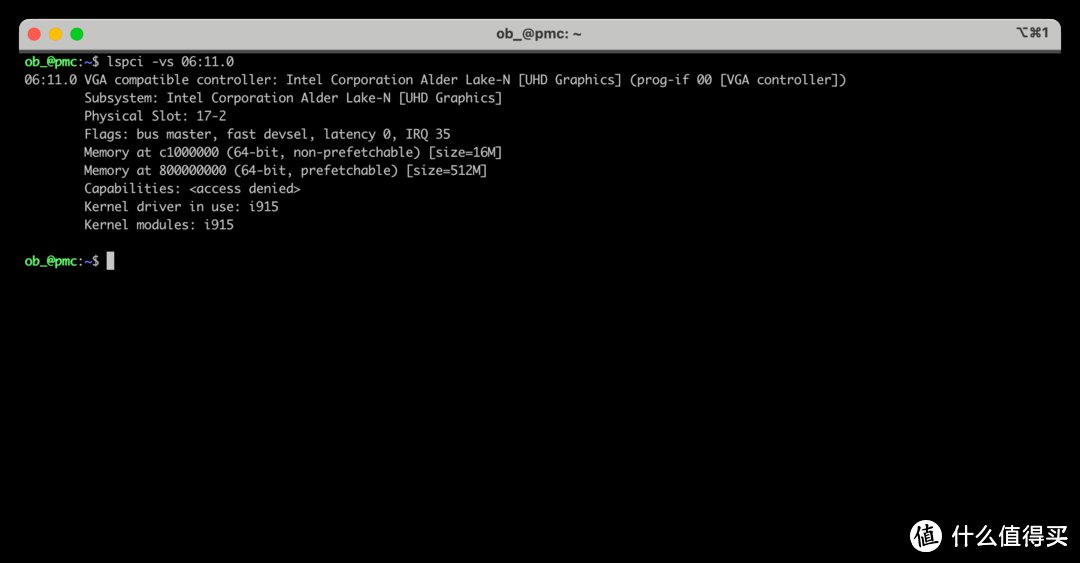
Running in SR-IOV VF mode 说明已经工作在 sr-iov 模式了!
# dmesg | grep i915
[ 0.000000] Command line: BOOT_IMAGE=/vmlinuz-6.4.0-0.deb12.2-amd64 root=/dev/mapper/pmc--vg-root ro quiet i915.enable_guc=3
[ 0.017516] Kernel command line: BOOT_IMAGE=/vmlinuz-6.4.0-0.deb12.2-amd64 root=/dev/mapper/pmc--vg-root ro quiet i915.enable_guc=3
[ 3.279578] i915: loading out-of-tree module taints kernel.
[ 3.279625] i915: module verification failed: signature and/or required key missing - tainting kernel
[ 3.807172] i915 0000:06:11.0: Running in SR-IOV VF mode
[ 3.813391] i915 0000:06:11.0: [drm] GT0: GUC: interface version 0.1.0.0
[ 3.823986] i915 0000:06:11.0: [drm] VT-d active for gfx access
[ 3.824015] i915 0000:06:11.0: [drm] Using Transparent Hugepages
[ 3.828662] i915 0000:06:11.0: [drm] GT0: GUC: interface version 0.1.0.0
[ 3.840880] i915 0000:06:11.0: GuC firmware PRELOADED version 1.0 submission:SR-IOV VF
[ 3.840886] i915 0000:06:11.0: HuC firmware PRELOADED
[ 3.846126] i915 0000:06:11.0: [drm] Protected Xe Path (PXP) protected content support initialized
[ 3.846135] i915 0000:06:11.0: [drm] PMU not supported for this GPU.
[ 3.846307] [drm] Initialized i915 1.6.0 20201103 for 0000:06:11.0 on minor 1
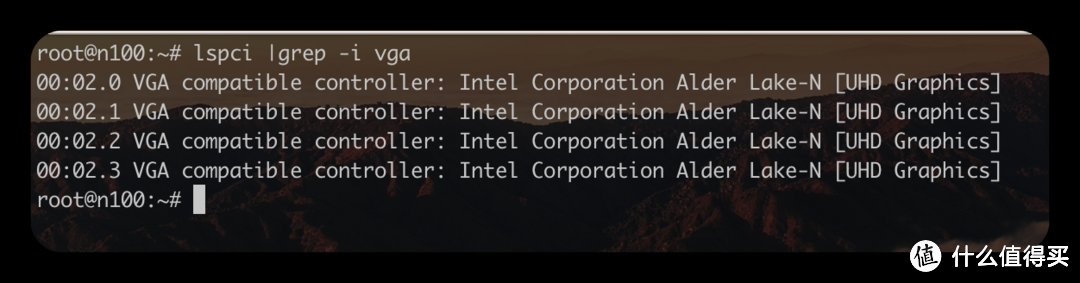
lspci | grep -i vga
00:01.0 VGA compatible controller: Device 1234:1111 (rev 02)\n06:11.0 VGA compatible controller: Intel Corporation Alder Lake-N [UHD Graphics]\n
done 完成
Windows Guest 设置 —— Win10 为例
install win10 guest 正常安装虚拟机
you can add SR-IOV gpu 可以添加虚拟显卡
cpu 必须 host 模式
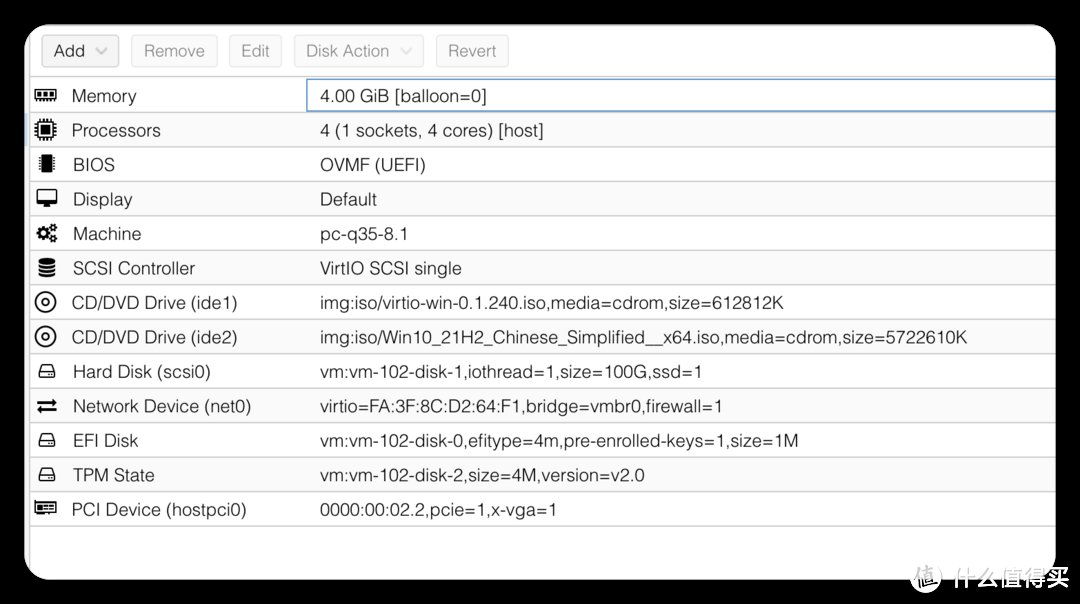
disable balloon 关闭内存共享
OVMF UEFI boot 必须使用 UEFI 启动
q35 chips 必须使用q35芯片组
SR-IOV GPU could be set primary GPU after install intel gpu drivers 安装驱动以后才能设置成主显卡,注意此时的vnc就不可用了,搞好网络设置和 rdp 再这么干 .
SR-IOV GPU must set pci-Express
注意:如果遇到 43 bug,禁用 igpu 显卡再重新启用可以解决。
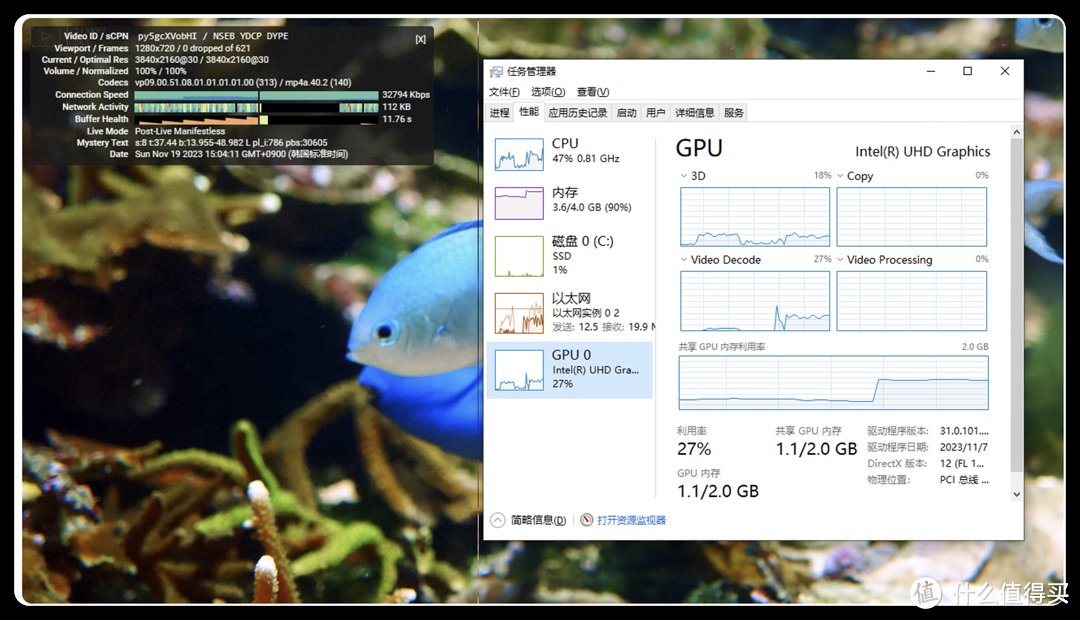
安装好虚拟机以后 ,进去设置好远程桌面,装好显卡驱动,就完成了!
After installed windows vm, must set rd desktop or other remote desk,
then install new intel gpu driver.
感谢阅读
欢迎点评!
加入圈子讨论!
阅读更多台式机精彩内容,可前往什么值得买查看
","gnid":"9d41e8fe01a1f2f08","goods_list":[{"goods_channel":"天猫精选","goods_cover":"https://p0.ssl.img.360kuai.com/t01afb539d7afeed409.jpg?size=600x600","goods_link":"https://go.smzdm.com/96fcf5cc995906a5/ca_fz_0_0_0_0_0_0_0","goods_name":"康耐信N100软路由器整机DDR4内存4网卡I226-V2.5G无风扇低功耗迷你工控主机12代CPU支持爱快PFSENSE等包邮","goods_pos":1,"goods_price":"759"},{"goods_channel":"天猫精选","goods_cover":"https://p0.ssl.img.360kuai.com/t01ccccd54af0be2725.jpg?size=600x600","goods_link":"https://go.smzdm.com/d3a17108db359dc8/ca_fz_0_0_0_0_0_0_0","goods_name":"康耐信intel10代N4100/J4125/N5000/N5030/4网卡I226-V2.5G网卡迷你静音软路由器小主机支持WIN10全国包邮","goods_pos":2,"goods_price":"498"},{"goods_channel":"天猫精选","goods_cover":"https://p0.ssl.img.360kuai.com/t0193a0c1bac0bea9a1.jpg?size=600x600","goods_link":"https://go.smzdm.com/bcd47080a472504b/ca_fz_0_0_0_0_0_0_0","goods_name":"康耐信N4505/N5105/N6005软路由器整机全2.5G4网口I226-V网卡静音无风WIN10爱快串口4KNVMEM.2接口迷你电脑","goods_pos":3,"goods_price":"569"}],"img_data":[{"flag":2,"img":[{"desc":"","height":810,"title":"","url":"https://p0.ssl.img.360kuai.com/t01d7cb23d2996ab016.jpg","width":1080},{"desc":"","height":"566","title":"","url":"https://p0.ssl.img.360kuai.com/t016404bcacf39000fd.jpg","width":"1080"},{"desc":"","height":"283","title":"","url":"https://p0.ssl.img.360kuai.com/t015770ab3dc347861a.jpg","width":"1080"},{"desc":"","height":"880","title":"","url":"https://p0.ssl.img.360kuai.com/t011bfa5033be0d8dbf.jpg","width":"1080"},{"desc":"","height":"807","title":"","url":"https://p0.ssl.img.360kuai.com/t01318d51c74415f892.jpg","width":"1080"},{"desc":"","height":"781","title":"","url":"https://p0.ssl.img.360kuai.com/t01270cc53e3c119b50.jpg","width":"1080"},{"desc":"","height":818,"title":"","url":"https://p0.ssl.img.360kuai.com/t013ff16dbbb84bfd52.jpg","width":1080},{"desc":"","height":"576","title":"","url":"https://p0.ssl.img.360kuai.com/t01bc65167a9c665b5b.jpg","width":"1080"},{"desc":"","height":"563","title":"","url":"https://p0.ssl.img.360kuai.com/t0156c07debbc25cac2.jpg","width":"1080"},{"desc":"","height":"563","title":"","url":"https://p0.ssl.img.360kuai.com/t01136f3c23bef31bfa.jpg","width":"1080"},{"desc":"","height":"604","title":"","url":"https://p0.ssl.img.360kuai.com/t0112ca4ed04ce827a4.jpg","width":"1080"},{"desc":"","height":"620","title":"","url":"https://p0.ssl.img.360kuai.com/t01aa1edbf41411c599.jpg","width":"1080"}]}],"original":0,"pat":"art_src_1,fts0,sts0","powerby":"cache","pub_time":1701084616000,"pure":"","rawurl":"http://zm.news.so.com/fd9ba88de03a5f270e79ea529e218391","redirect":0,"rptid":"e73c4fc3bd7b5569","rss_ext":[],"s":"t","src":"什么值得买","tag":[{"clk":"kdigital_1:win10","k":"win10","u":""},{"clk":"kdigital_1:显卡","k":"显卡","u":""},{"clk":"kdigital_1:cpu","k":"cpu","u":""}],"title":"pve 记录 篇五:N100小主机 ——显卡虚拟化及虚拟机设置
蒲科顾3335显示卡无法启动错误代码10,是系统的问题还是显示卡本身的问题?求解
充贱连13069749096 ______ 那就显卡问题呗.是不是电容爆浆了,或者芯片坏了..
蒲科顾3335当我查看显卡时会显示 该设备无法启动. (代码 10) 这是怎么回事?怎么解决?
充贱连13069749096 ______ 驱动问题吧~ 你去下载一个驱动装了~
蒲科顾3335我的显卡是nvidia geforce 7025,电脑总是显示错误代码10,如何处理? -
充贱连13069749096 ______ 没有安装驱动或安装方法不对.解决方法如下:用显卡配套的光盘里面就有独立显卡的驱动.或到显卡的官方网站下载对应型号的显卡驱动. 我的电脑--属性--硬件--设备管理器--声音 视频和游戏控制器--右击打?(!)号设备--删除显卡,没有问叹号也要删除. 重启电脑发现新硬件--按提示安装显卡驱动 也可右键点击'我的电脑'----属性----硬件----设备管理器----双击?(!)设备(显卡)----点击'更新驱动程序'----选择'只这一次'后点击'下一步'----选择'自己下载的显卡驱动的具体位置'后点击'下一步'----开始
蒲科顾3335显卡无法启用,代码10,怎么解决?
充贱连13069749096 ______ 尝试卸载显卡驱动后重新安装, 如果还不行,请拔掉显卡用橡皮等擦拭金手指,再重新装回.
蒲科顾3335NVIDIA Geforce 8500GT 该设备无法启动. (代码 10) -
充贱连13069749096 ______ 一般来说是硬件不稳定问题.分三步来排除解决它: 1、关机拨下显卡,用刷子将灰尘和脏物清理干净,特别是插槽位置部分. 2、在插回显卡时,不要用力太大将它插的太进,留点余地.通电开机看下是否识别检测正常. 3、同时检查和安装一下系统的漏洞补丁,让系统保持最佳状态.
蒲科顾3335显卡 启动代码10 是怎么回事 怎么解决 -
充贱连13069749096 ______ 没装显卡驱动吧 还有不要指望9400GT能好到哪里去 这就是张神卡 玩大型游戏神一般的卡
蒲科顾3335显卡驱动装不上(错误代码10)
充贱连13069749096 ______ 首先, 1确定你的显卡接触良好 2.下载最新的N卡驱动 3.卸载驱动. 4.重新安装
蒲科顾3335我的本本说是显卡无法正常启用,错误代码10,属性 - 资源提示“该设备有问题,没有使用任何资源”跪求解决, -
充贱连13069749096 ______ 此类问题比较普遍,如果显卡硬件没问题的话,那就是驱动程序出错了,可重新安装下驱动即可
蒲科顾3335笔记本显卡(Geforce FX5200 32/64)无法正常启用,提示错误代码10,安装驱动一样的效果.请问是怎么回事?
充贱连13069749096 ______ 未装正确的驱动或资源被其他设备占用. 查看显卡属性--资源 可能显卡故障,你拿到朋友那试试,如果显卡没有问题那就是主板了.
蒲科顾3335显卡出毛病了,无法启动错误代码10 资源里显示该设备有问题,显卡型号是NVIDIA Geforce 8400 GS
充贱连13069749096 ______ 能开机时吧,你把显卡驱动卸载了,从新安装正常驱动试试下