git生成ssh密钥详细步骤
作者:烟圈823215077
前言
pve下创建黑苹果虚拟机主要使用到以下2个项目:
https://github.com/thenickdude/OSX-KVM(可以编译恢复镜像文件)

https://github.com/thenickdude/KVM-Opencore/releases(下载针对pve定制的标准化opencore引导文件)

编译恢复镜像文件
在pve的lxc下编译恢复镜像文件:
apt update && apt upgrade -y
apt install git qemu-utils make -y
git clone https://github.com/thenickdude/OSX-KVM.git
cd /root/OSX-KVM/scripts/monterey
make Monterey-recovery.img

不知道怎么在pve下创建lxc容器,可以看我以前的文章:
140包邮i3-6100u板U(itx)上安装PVE8.1
pve8.1创建lxc容器
lxc(bookworm)下创建docker环境
使用docker搭建各类nas应用
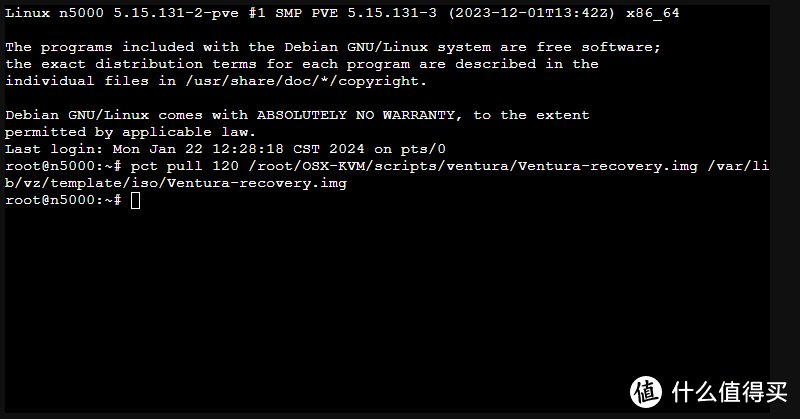
在宿主pve下:
将恢复镜像文件拷贝至宿主iso目录:
pct pull /root/OSX-KVM/scripts/monterey/Monterey-recovery.img /var/lib/vz/template/iso/Monterey-recovery.img
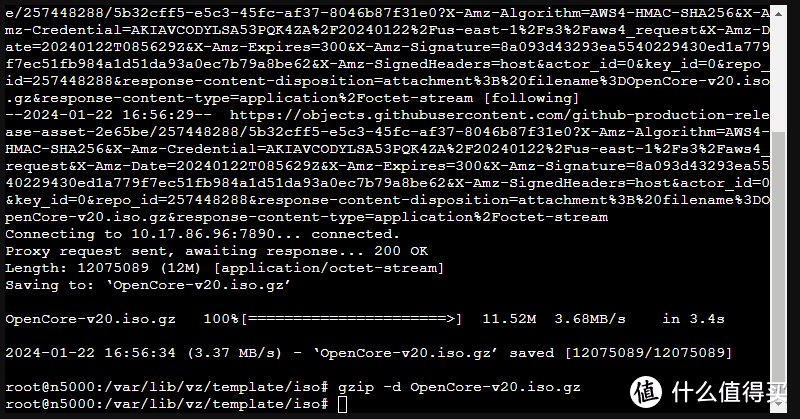
下载opencore引导文件
下载opencore引导文件至iso目录:
cd /var/lib/vz/template/iso/
wget https://github.com/thenickdude/KVM-Opencore/releases/download/v20/OpenCore-v20.iso.gz
gzip -d OpenCore-v20.iso.gz

创建黑苹果虚拟机
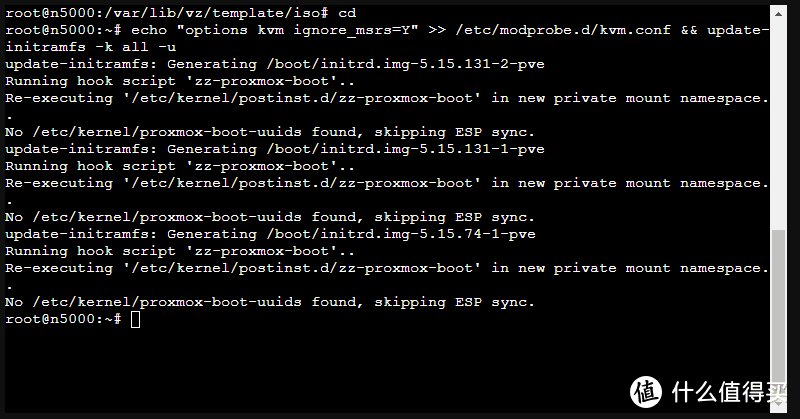
创建前设置
避免循环引导(宿主pve下):
echo "options kvm ignore_msrs=Y" >> /etc/modprobe.d/kvm.conf && update-initramfs -k all -u
创建VM
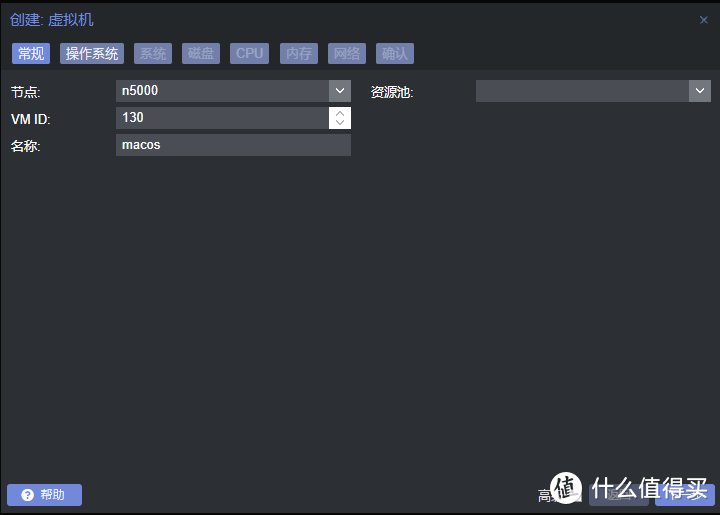
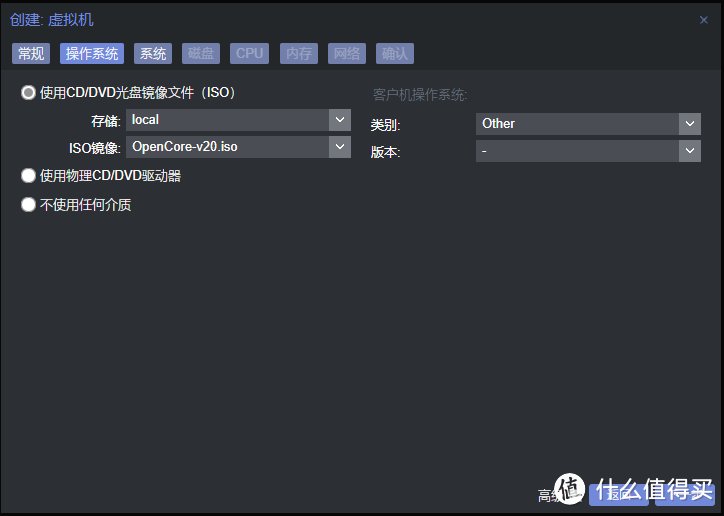
1、操作系统:
类别:other
ISO镜像:opencore
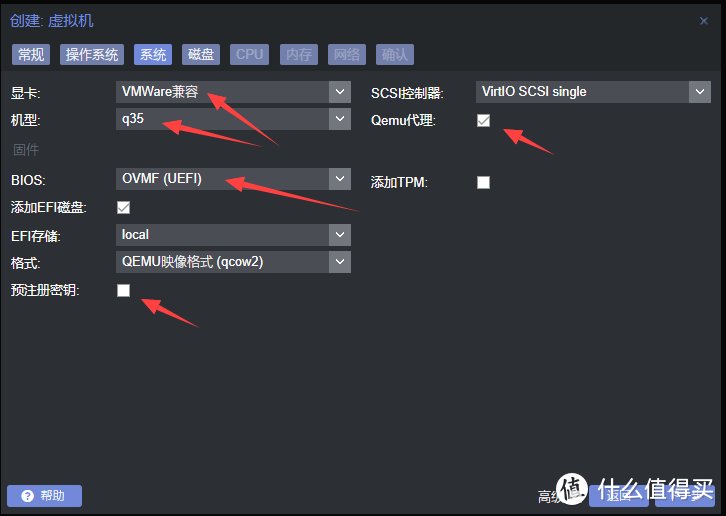
2、系统
显卡:Vmware兼容
机器:q35
Qemu代理:勾选
BIOS:UEFI
Pre-Enroll keys(预注册密钥):取消勾选
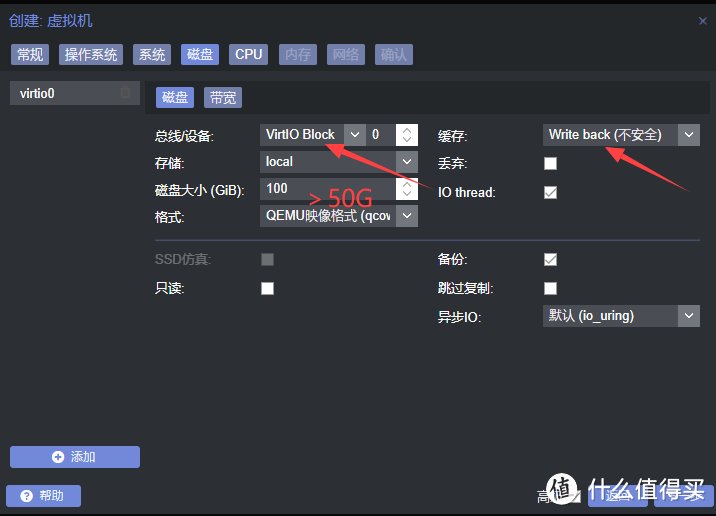
3、硬盘:
总线:VirtIO Block
缓存:Write Back(不安全)
磁盘大小:50G以上
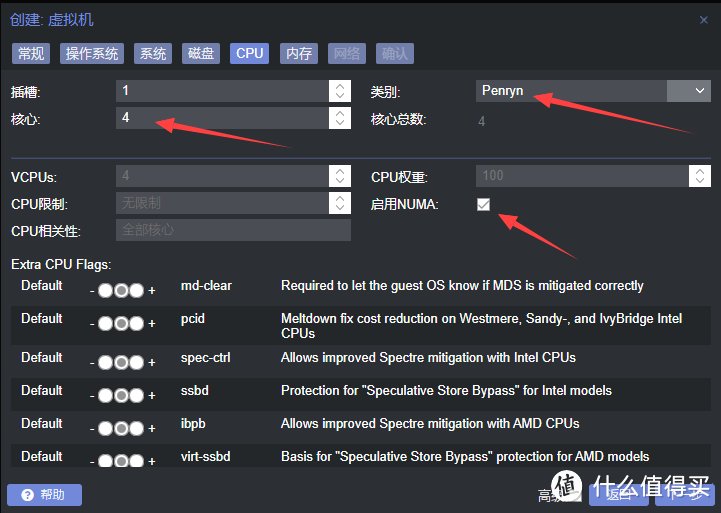
4、CPU
核心数:2的次幂
类型:penryn
启用NUMA:勾选
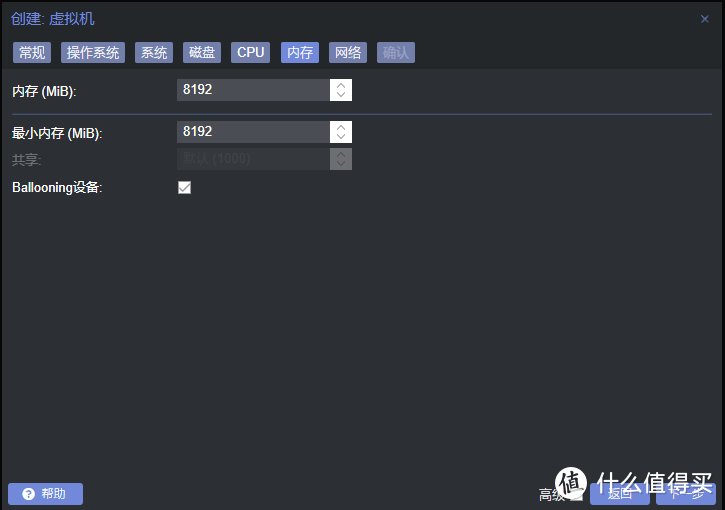
5、内存
根据配置情况及需求分配(建议4G以上)
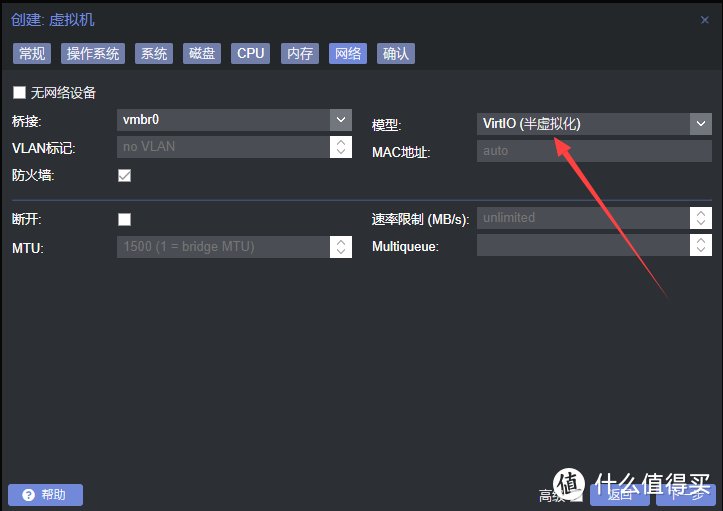
6、网络
模型:VirtIO(半虚拟化)
7、完成初步创建(不勾选创建后启动)
修改VM
1、在创建的VMID下-硬件-添加CD/DVD驱动器-添加恢复镜像

2、回宿主(pve)的ssh下修改配置文件
nano /etc/pve/qemu-server/.conf
a、添加参数:
intel: args: -device isa-applesmc,osk="ourhardworkbythesewordsguardedpleasedontsteal(c)AppleComputerInc" -smbios type=2 -device usb-kbd,bus=ehci.0,port=2 -global nec-usb-xhci.msi=off -cpu host,kvm=on,vendor=GenuineIntel,+kvm_pv_unhalt,+kvm_pv_eoi,+hypervisor,+invtsc
AMD: args: -device isa-applesmc,osk="ourhardworkbythesewordsguardedpleasedontsteal(c)AppleComputerInc" -smbios type=2 -device usb-kbd,bus=ehci.0,port=2 -global nec-usb-xhci.msi=off -cpu Penryn,kvm=on,vendor=GenuineIntel,+kvm_pv_unhalt,+kvm_pv_eoi,+hypervisor,+invtsc,+pcid,+ssse3,+sse4.2,+popcnt,+avx,+avx2,+aes,+fma,+fma4,+bmi1,+bmi2,+xsave,+xsaveopt,check

b、修改光驱属性:
将2个光驱类文件定义中的media=cdrom改成cache=unsafe
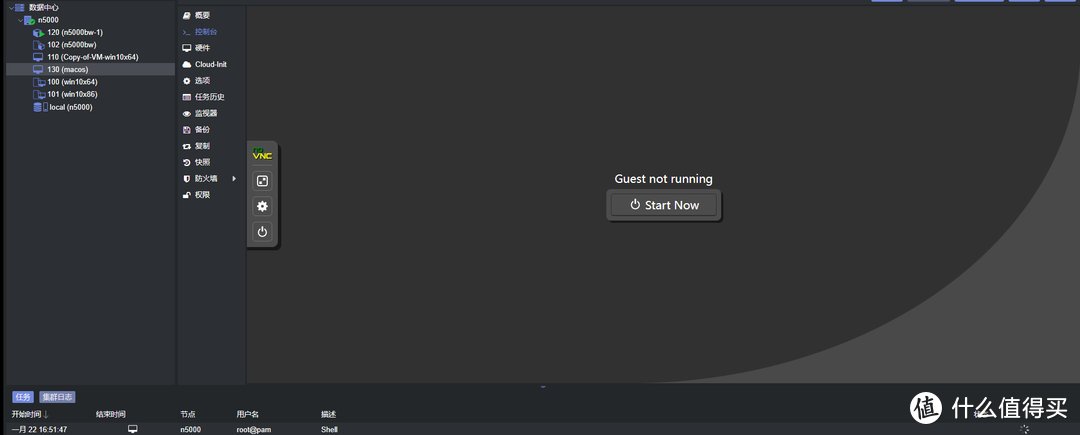
启动虚拟机
在黑苹果虚拟机控制台点击“Start Now”。
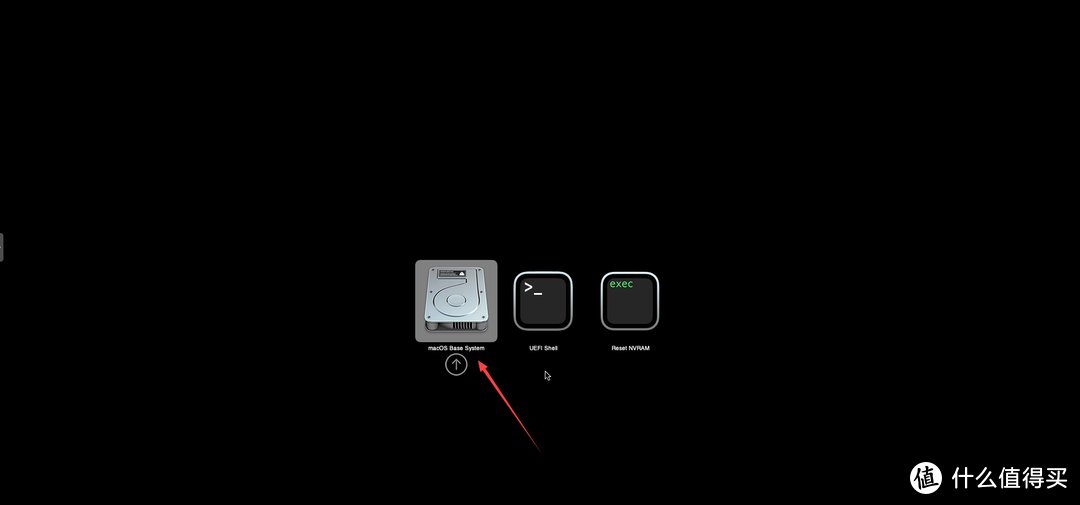
2.左右键选择MacOS Base System,并按回车确认进行安装。
3.等待进度条跑完,这里需要一点时间。

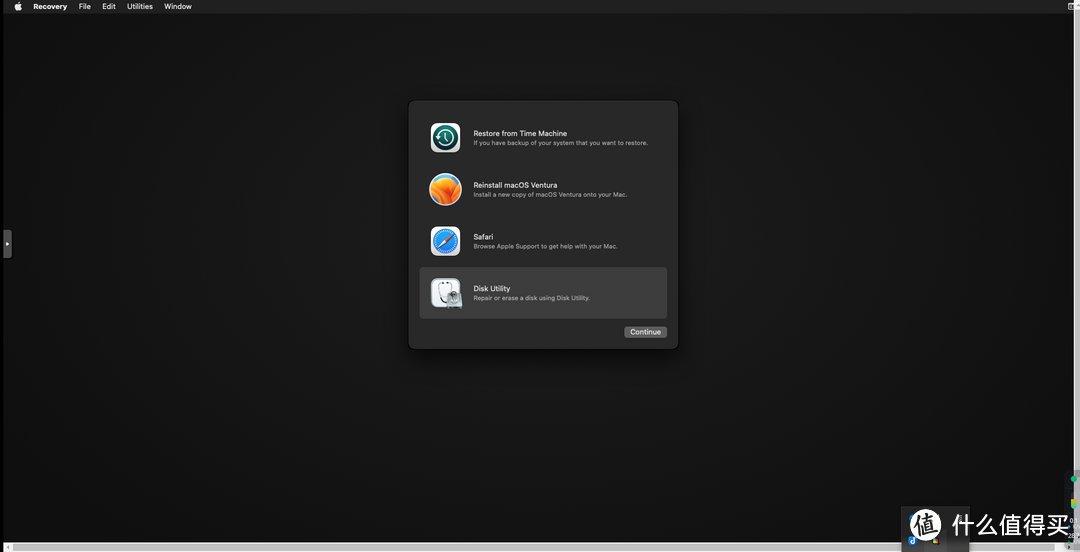
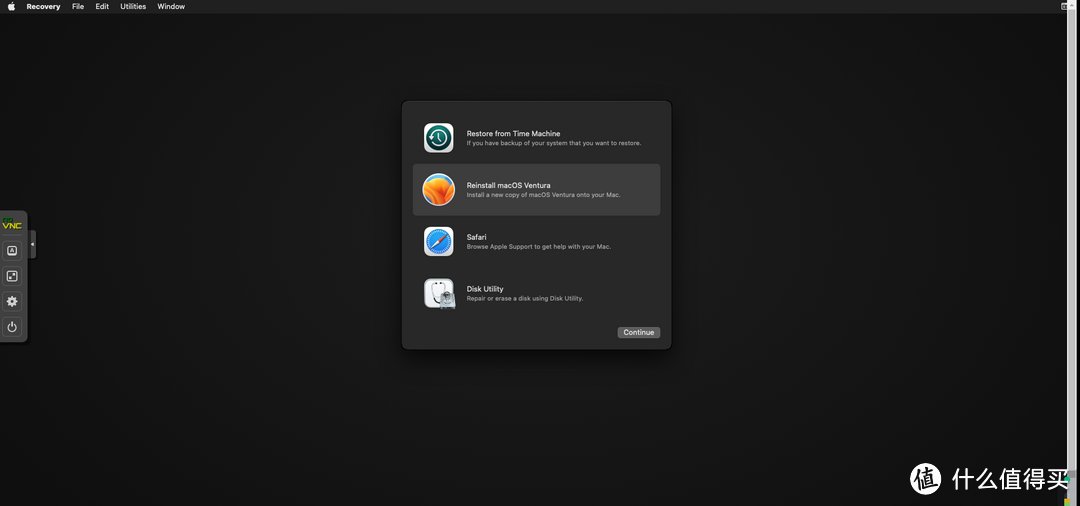
4.在弹出的界面中选择第四项“Disk Utility”,并点击Continue。
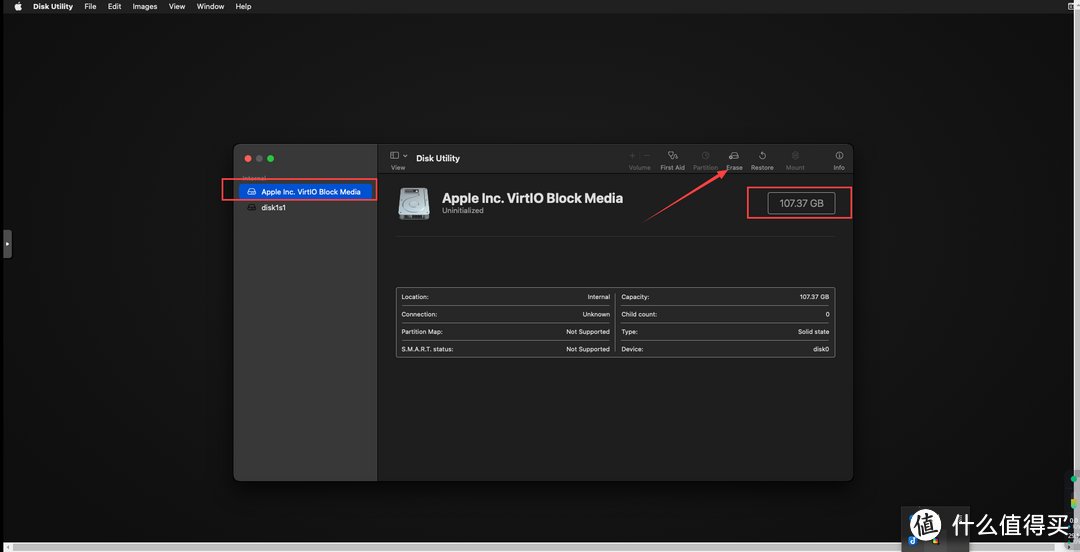
5.选择创建的虚拟空磁盘,并点击Erase。
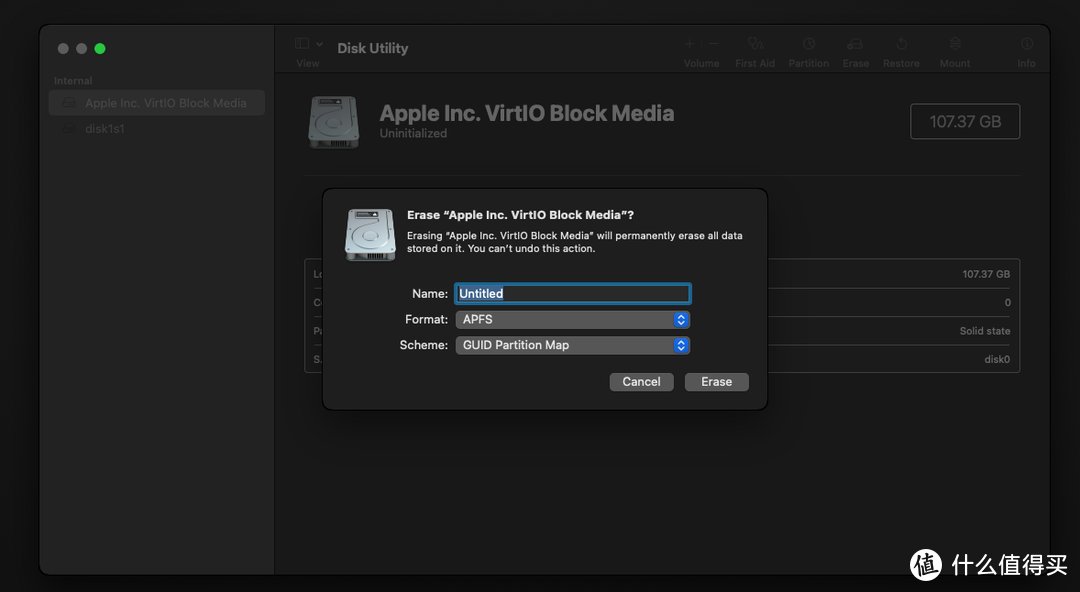
6.修改盘符名称(也可不修改),并点击Erase。
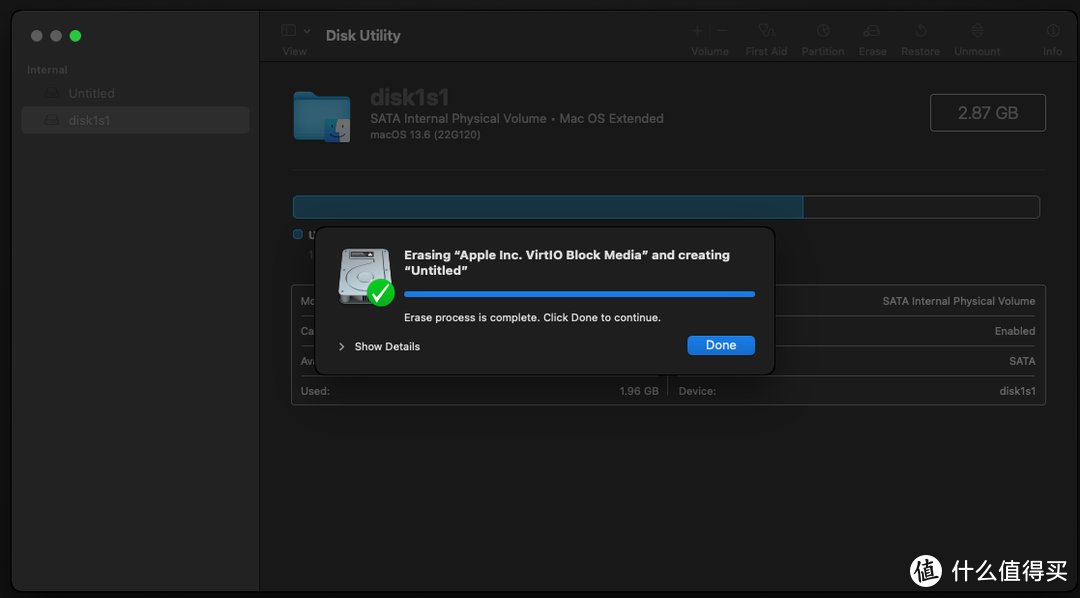
7.完成后,选择Done,并关闭“Disk Utility”界面。
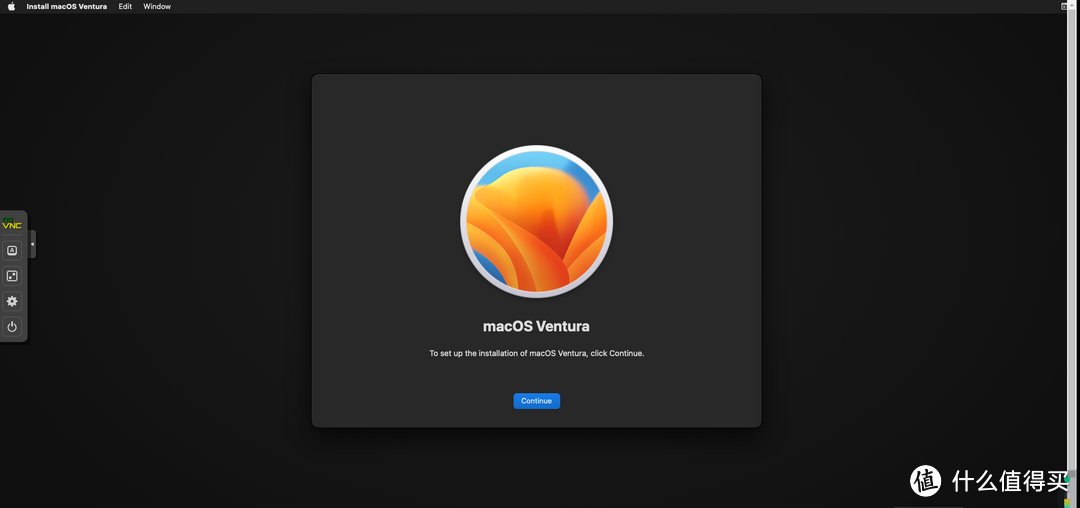
8.选择第二项“Reinstall macOS xxx”,并点击Continue。
9.在弹出的界面中,再次点击Continue。
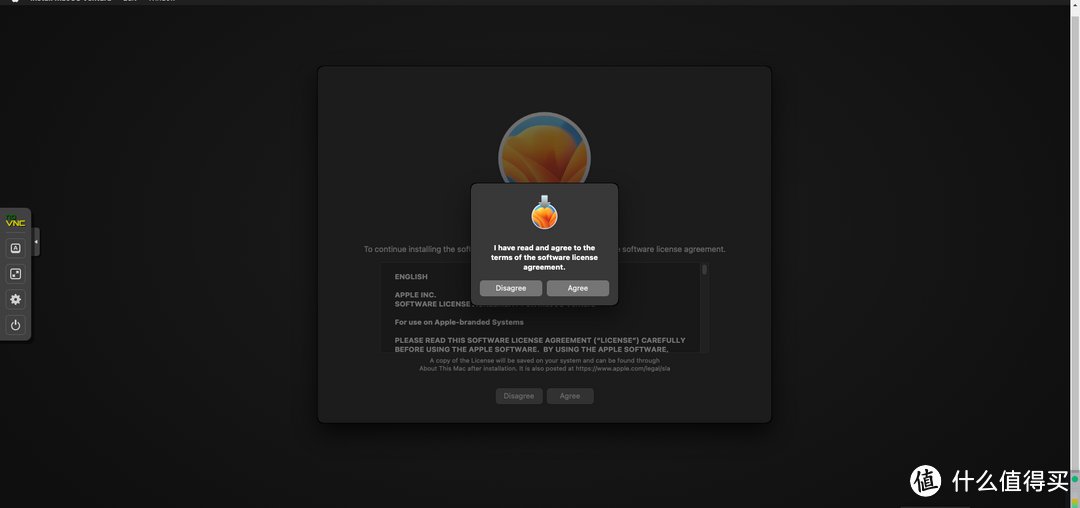
10.下图选择Agree/Agree两次。
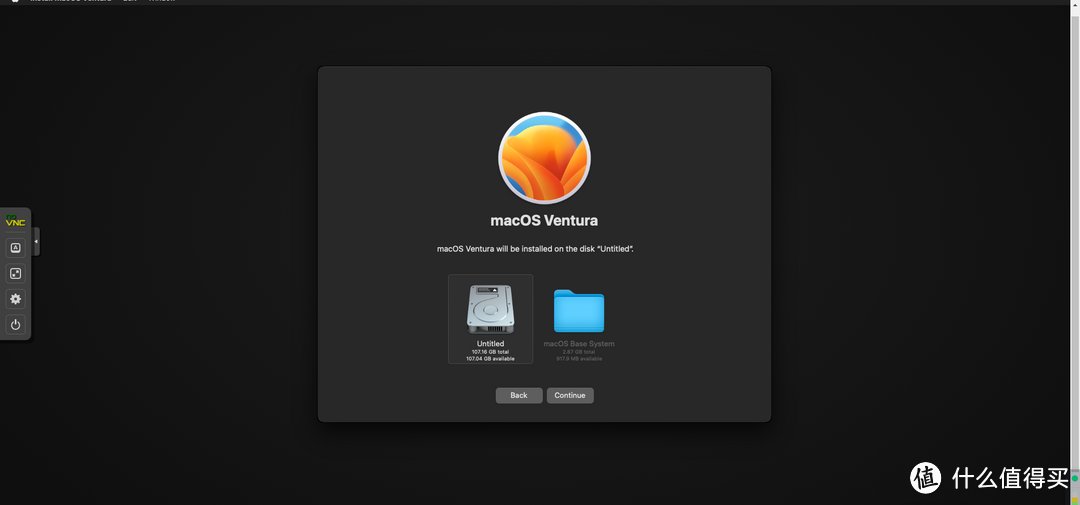
11.选择前面格式化的磁盘,并点击Continue。
12.需要等较长一段时间,进行黑苹果系统的恢复,后续均为傻瓜化操作(注意选择Installer,需重启几次),这里略过。
13.最终将会得到一个黑苹果的虚拟机如下图所示。
至此,黑苹果虚拟机创建完成。
查看文章精彩评论,请前往什么值得买进行阅读互动
","gnid":"9752dc32f5b98b186","img_data":[{"flag":2,"img":[{"desc":"","height":"700","title":"","url":"https://p0.ssl.img.360kuai.com/t012719a3ab7da5cc90.jpg","width":"1080"},{"desc":"","height":"641","title":"","url":"https://p0.ssl.img.360kuai.com/t019dadf8514b8a3f06.jpg","width":"1080"},{"desc":"","height":"307","title":"","url":"https://p0.ssl.img.360kuai.com/t01935e03e82e726e82.jpg","width":"1080"},{"desc":"","height":"419","title":"","url":"https://p0.ssl.img.360kuai.com/t012a0af079f50170f9.jpg","width":"800"},{"desc":"","height":"419","title":"","url":"https://p0.ssl.img.360kuai.com/t016b18d422d347ff1a.jpg","width":"800"},{"desc":"","height":"419","title":"","url":"https://p0.ssl.img.360kuai.com/t0136838eaa9282594b.jpg","width":"800"},{"desc":"","height":"419","title":"","url":"https://p0.ssl.img.360kuai.com/t0188a970d744cd03bd.jpg","width":"800"},{"desc":"","height":"515","title":"","url":"https://p0.ssl.img.360kuai.com/t01e560f031893420e4.jpg","width":"720"},{"desc":"","height":"516","title":"","url":"https://p0.ssl.img.360kuai.com/t01a77357e7fcb281ee.jpg","width":"724"},{"desc":"","height":"516","title":"","url":"https://p0.ssl.img.360kuai.com/t016d3553fa87cdf8df.jpg","width":"726"},{"desc":"","height":"516","title":"","url":"https://p0.ssl.img.360kuai.com/t0198b586b864ce8d6b.jpg","width":"716"},{"desc":"","height":"513","title":"","url":"https://p0.ssl.img.360kuai.com/t0193a20be2f5c2de06.jpg","width":"721"},{"desc":"","height":"510","title":"","url":"https://p0.ssl.img.360kuai.com/t01ee6d9394813120e1.jpg","width":"725"},{"desc":"","height":"511","title":"","url":"https://p0.ssl.img.360kuai.com/t0184e0f2590cba3778.jpg","width":"723"},{"desc":"","height":"662","title":"","url":"https://p0.ssl.img.360kuai.com/t01c874fc37bddea2ab.jpg","width":"1080"},{"desc":"","height":"552","title":"","url":"https://p0.ssl.img.360kuai.com/t01fe313b43d2bdfed7.jpg","width":"1080"},{"desc":"","height":"435","title":"","url":"https://p0.ssl.img.360kuai.com/t017d9ebb230616793b.jpg","width":"1080"},{"desc":"","height":"505","title":"","url":"https://p0.ssl.img.360kuai.com/t01f5c5c15f995062c7.jpg","width":"1080"},{"desc":"","height":"509","title":"","url":"https://p0.ssl.img.360kuai.com/t01c0b3792c28a6f083.jpg","width":"1080"},{"desc":"","height":"552","title":"","url":"https://p0.ssl.img.360kuai.com/t017e4607eceeda60eb.jpg","width":"1080"},{"desc":"","height":"552","title":"","url":"https://p0.ssl.img.360kuai.com/t01190b5fab29aa79b2.jpg","width":"1080"},{"desc":"","height":"592","title":"","url":"https://p0.ssl.img.360kuai.com/t014fc5ad533af7bd5d.jpg","width":"1080"},{"desc":"","height":"598","title":"","url":"https://p0.ssl.img.360kuai.com/t013dba0ac590c8c94e.jpg","width":"1080"},{"desc":"","height":"506","title":"","url":"https://p0.ssl.img.360kuai.com/t010f83314200cf4c83.jpg","width":"1080"},{"desc":"","height":"508","title":"","url":"https://p0.ssl.img.360kuai.com/t012a43c498ccb27b45.jpg","width":"1080"},{"desc":"","height":"508","title":"","url":"https://p0.ssl.img.360kuai.com/t011ccc7b330d7421f4.jpg","width":"1080"},{"desc":"","height":"505","title":"","url":"https://p0.ssl.img.360kuai.com/t01b81bf146a629bb3f.jpg","width":"1080"},{"desc":"","height":"608","title":"","url":"https://p0.ssl.img.360kuai.com/t01f8998f3945051cc9.jpg","width":"1080"}]}],"original":0,"pat":"art_src_1,fts0,sts0","powerby":"pika","pub_time":1705923305000,"pure":"","rawurl":"http://zm.news.so.com/68e721ea4bd8433354ed37c75597df07","redirect":0,"rptid":"3e00c6b14d54feaf","rss_ext":[],"s":"t","src":"什么值得买","tag":[{"clk":"ktechnology_1:apple","k":"apple","u":""}],"title":"pve创建黑苹果
崔哄史4745windows git生成密钥的位置怎么更改 -
符妻园15345989482 ______ Git客户端SourceTree生成密钥key 工具/原料 电脑 SourceTree生成密钥key 方法/步骤 为什么要生成密钥呢?其实它的作用就是在上传和下载是时要用到的只要在远程仓库中添加了ssh密钥在上传和下载时就不用来回输入用户名和密码了.这样方...
崔哄史4745git客户端怎么进入sshkeys在哪 -
符妻园15345989482 ______ TortoiseGit并没有自带PuTTY客户端,你需要先去下载一个. 在 Session 界面,设置 Host Name 和 Port: 在 Connect->SSH->Auth 界面,设置 Private Key: 回到 Session 界面,保存 Session. 有了 Session 之后,就可以在TortoiseGit中将这个 Se...
崔哄史4745如何利用github进行代码审查 -
符妻园15345989482 ______ 上传分享代码1.在GitHub上建立项目 登录GitHub后,你可以在右边靠中那里找到一个按钮“New Repository”,点击过后,填入项目名称、说明和网址过后就可以创建了,然后会出现一个提示页面,记下类似[email protected]:XXX/XXX.git的地址...
崔哄史4745在windows下怎么添加github的ssh公钥 -
符妻园15345989482 ______ windows下如何github ssh 公钥1. 安装git,从程序目录打开 "Git Bash" 2. 键入命令:ssh-keygen -t rsa -C "[email protected]" "[email protected]"...
崔哄史4745如何添加ssh key给github -
符妻园15345989482 ______ Git是分布式的代码管理工具,远程的代码管理是基于SSH的,所以要使用远程的Git则需要SSH的配置.github的SSH配置如下:一 、 设置Git的user name和email:$ git config --global user.name "xuhaiyan"$ git config --global user.email "...
崔哄史4745如何向git账号上提交代码 -
符妻园15345989482 ______ 您好,产生SSH key 根据Github提供的help文档,具体过程如下 $ cd ~/.ssh # Checks to see if there is a directory named ".ssh" in your user directory 使...
崔哄史4745如何使用ssh登录linux服务器 -
符妻园15345989482 ______ 默认配置 Windows下有很多SSH工具.在这里我是用的是Putty.如果安装了Git并配置使用Putty的话,就不需要另外在安装Putty了.使用SSH连接服务器的命令如下: ssh IP地址 一般来说为了安全性考虑,端口号等一些参数并不会使用默认值...
崔哄史4745如何在windows下安装GIT -
符妻园15345989482 ______ 安装方法如下:1、输入官方地址,点击Download跳转到下载列表,然后选择对应版本下载到本地.注:有可能网络下载比较慢,耐心等待,不要中途取消.2、双击下载好Git安装文件,进行安装,顺序点击next,直到出现Select components如下图的时候选中simple context menu,当然也这步骤也可以默认.3、安装接续Next,一路默认知道出现Finish安装则完成.4、在应用程序中选 择Git Bash 或 Git GUI 即可进行git的相关操作.5、最后给出三个个代码托管网站bitbucket,github,google code,而其中bitbucket可以免费建私人仓库.
崔哄史4745window下 git 克隆文件时 要先创建ssh key吗 -
符妻园15345989482 ______ 1、首先你要安装Git工具2、右键鼠标,选中 “Git Bash here”,当然你也可以在windows的 “开始”--->“所以程序”,或者安装目录打开它3、输入指令,进入.ssh文件夹 cd ~/.ssh/ 如果提示 “ No such file or directory”,你可以手动的创建一...
崔哄史4745如何使用SSH登录远程服务器 -
符妻园15345989482 ______ 你好, 默认配置 Windows下有很多SSH工具.在这里我是用的是Putty.如果安装了Git并配置使用Putty的话,就不需要另外在安装Putty了.使用SSH连接服务器的命令如下: ssh IP地址 一般来说为了安全性考虑,端口号等一些参数并不会使用...